Hi all,
If you’ve just started learning guitar, you might find that you’re having difficulty getting your fingers to go where you want them to – but stick with it! With regular, accurate practice, you will see an improvement.
But what should you learn first? Is there a correct order?
Well, not really a correct order however I do recommend to all of my students that they should learn their basic chords as soon as possible – what I call ‘the big eight’.
These 8 chords will keep cropping up as you learn and if you don’t get them down now, you will find that they will hold you up in the future when you’re trying to learn songs. They might take some time to master but if you can aim to get them sounding clear and committed to memory in around 4 weeks then you are doing well.
Below I have outlined your 4 week program – patience is the key here, stay relaxed and have fun!
Week 1
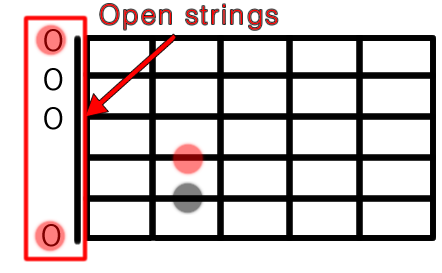
E Minor

A Minor

Week2
E Major

D Minor

Week 3
A Major

D Major

Week 4
C Major

G Major